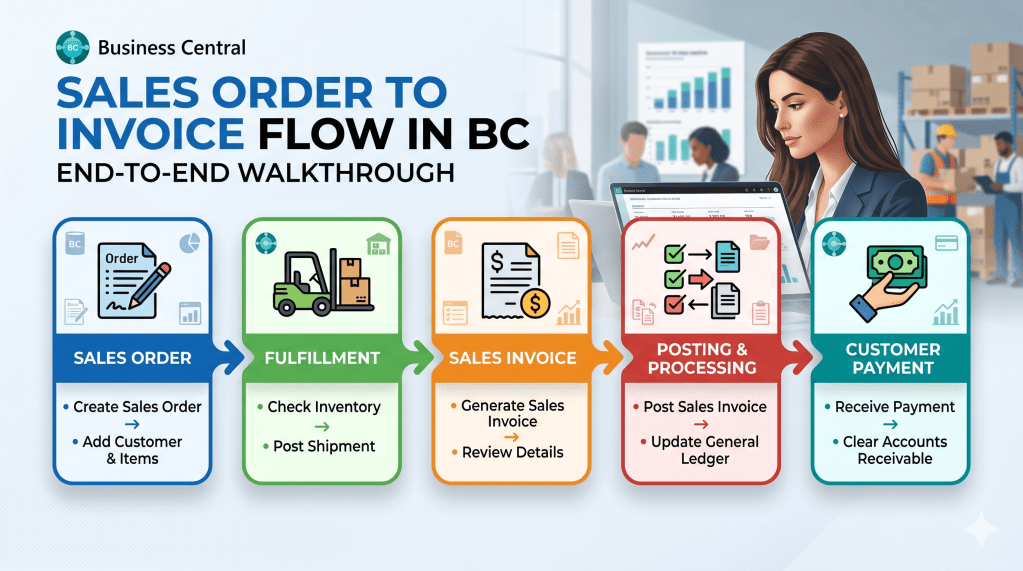
For any business utilizing Microsoft Dynamics 365 Business Central, the Order-to-Cash lifecycle is the primary engine that drives revenue. While the underlying technical architecture is highly sophisticated, a Functional Consultant or Solution Architect must be able to map these steps seamlessly to real-world warehouse and accounting operations.
In this field guide, we will walk through the exact end-to-end sequence of a standard Sales Order, analysing the required data points, user actions, and ledger impacts at every milestone.
Step 1: Creating the Sales Order
The process begins when a customer commits to a purchase. In Business Central, this is captured via the Sales Order (Page 42) card.
When you enter the Customer No., the system instantly initializes background rules. It references your preconfigured Posting Groups to determine financial routing, evaluates the customer’s credit limits, and establishes target shipping dates using built-in Order Promising parameters.

Next, add your inventory lines. In the Lines FastTab, select the Type as Item, enter the item number, specify the location code, and input the required quantity.
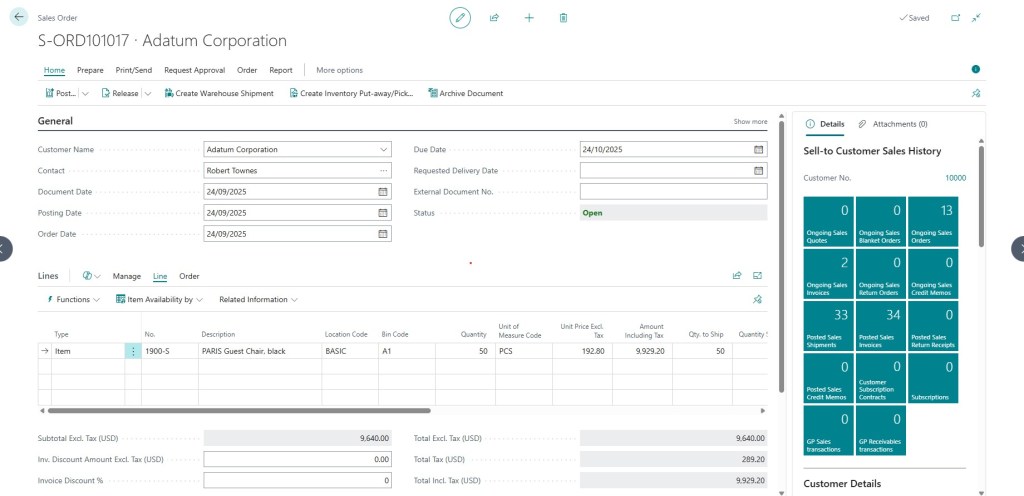
Architect’s Note: At this stage, physical inventory has not moved. However, Business Central automatically updates the Qty. on Sales Order metric on the Item Card. This dynamically alters your availability metrics, preventing other sales channels from over-allocating the same stock.
Step 2: Releasing the Order for Operations
While a Sales Order is in an Open status, fields can be modified freely. Once the data is verified and ready for the warehouse or logistics team, the order must be officially authorized.
Click Release in the top action menu. This changes the status field from Open to Released, locking the document parameters and signaling to the operational teams that the order is ready for fulfillment.
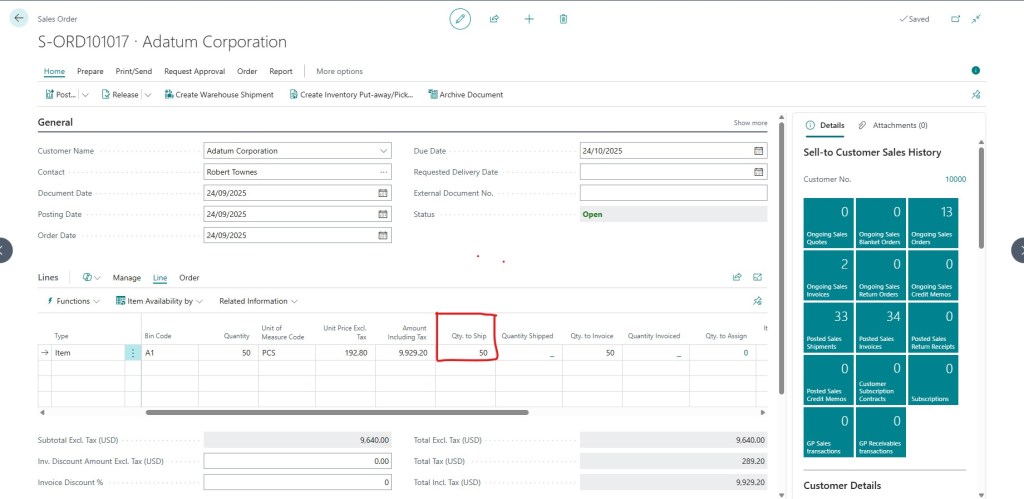
Step 3: The Shipping Phase (Physical Movement)
The shipping milestone represents the physical delivery of goods to the customer. In a basic location configuration, this is executed directly on the Sales Order document itself.
Verify that the Qty. to Ship field matches the physical quantity leaving your facility. Then, navigate to Post > Ship.
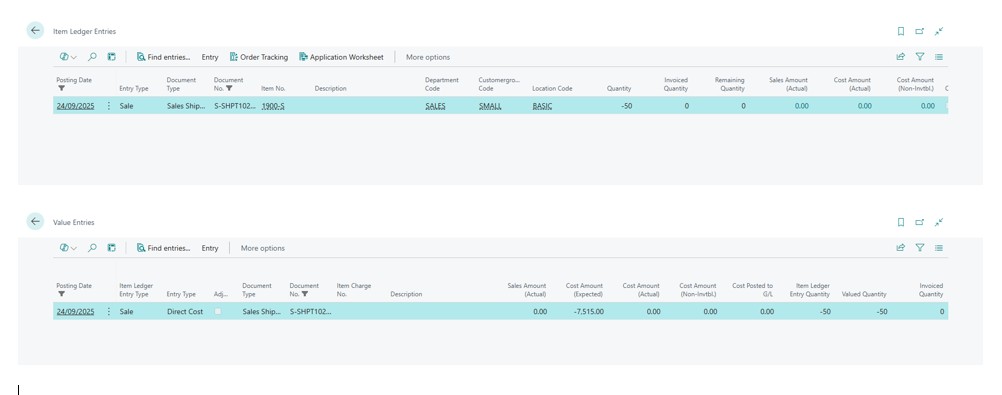
The Operational Ledger Impact:
Posting the shipment creates a permanent, non-editable Posted Sales Shipment document. Behind the scenes, the system executes two critical data steps:
- Item Ledger Entry: Reduces the physical inventory quantity at the designated Location Code.
- Value Entry: Writes a temporary financial buffer entry to account for shipped-but-not-yet-invoiced cost parameters.
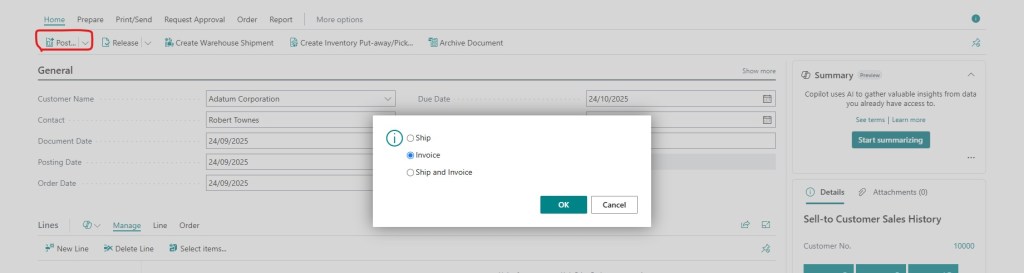
Step 4: The Invoicing Phase (Financial Finalization)
The final step transforms the physical delivery into a formal financial obligation. Once the customer is ready to be billed, verify that the Qty. to Invoice matches the shipped quantities.
Navigate to Post > Invoice (or combine both steps initially using Ship and Invoice).
The Permanent Ledger Impact:
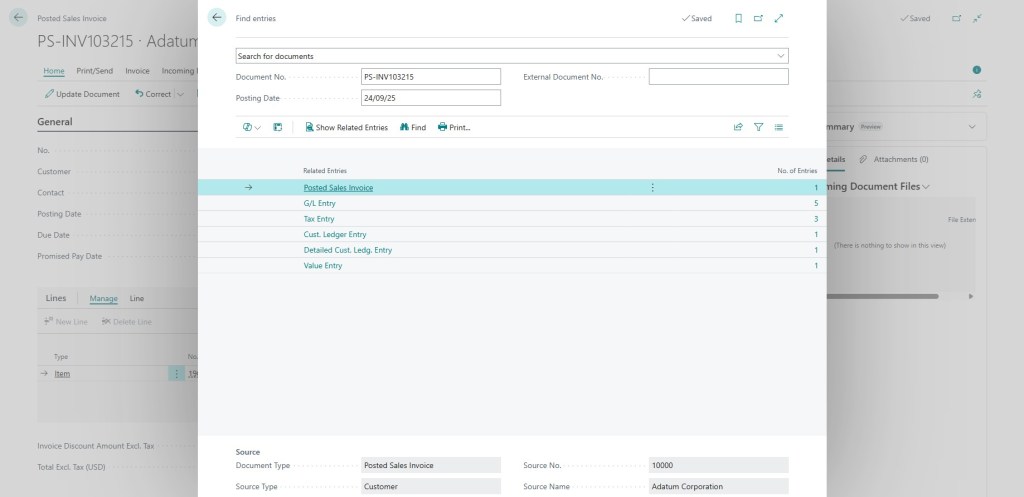
This action fully closes out the active Sales Order lifecycle and generates a permanent Posted Sales Invoice (Page 132). It triggers a massive multi-ledger reconciliation across your database:
- Customer Ledger Entries: Establishes an open balance against the customer card, updating Accounts Receivable.
- General Ledger Entries: Formally recognizes the Revenue, adjusts Accounts Receivable, and moves estimated costs into permanent Cost of Goods Sold (COGS) accounts.
- Value Entries: Closes out the temporary buffer and locks in the final actual product cost calculation.
The Foundation for Agentic Automation
Understanding this end-to-end operational matrix down to the exact field validation and ledger entry is more than just standard functional consulting knowledge it is the absolute prerequisite for building next-generation Agentic ERP workflows.
To build an AI agent capable of autonomously auditing invoice discrepancies, matching shipping documents, or clearing discrepancies, the machine intelligence must be trained on these exact structural boundaries.
