
As a company scales, inventory rarely lives in a single warehouse. Operations expand into regional distribution centers, retail storefronts, third-party logistics (3PL) facilities, and service vehicle fleets.
In Microsoft Dynamics 365 Business Central, managing multi-site inventory isn’t just about knowing what you have it’s about knowing where it is, what it costs at that specific site, and tracking stock while it moves between locations.
Without a well-architected location and transfer structure, businesses face “ghost inventory,” unaccounted transit losses, and skewed regional margins. In this guide, we break down how to configure multiple locations, establish transfer routes, and execute stock transfers with full in-transit visibility.
1. Location Architecture in Business Central
Before touching setup pages, you need to categorize your physical and virtual nodes. In Business Central, a Location can represent:
- Physical Warehouses: Main distribution centers, regional hubs.
- Retail Stores / Outlets: Direct point-of-sale inventory holding.
- Mobile / Consignment: Service technician vans or customer-consigned stock.
- In-Transit Locations: Dedicated virtual holding locations representing inventory loaded on trucks, ships, or planes.
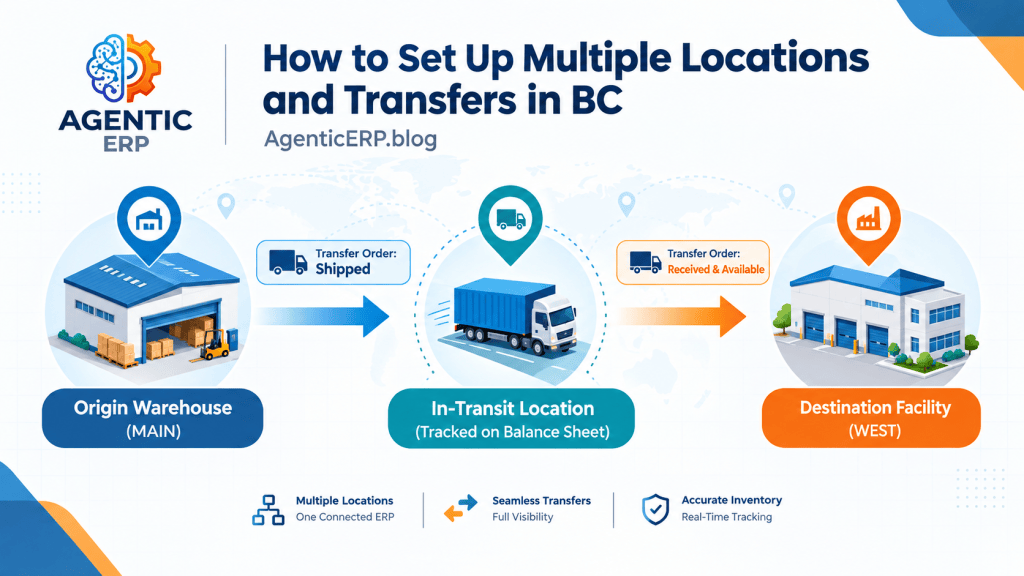
[ East Distribution Hub ]
│
▼ (Transfer Order: Shipped)
[ IN-TRANSIT LOCATION ] <── Tracked on Balance Sheet
│
▼ (Transfer Order: Received)
[ West Regional Facility ]
2. Setting Up a New Location Card
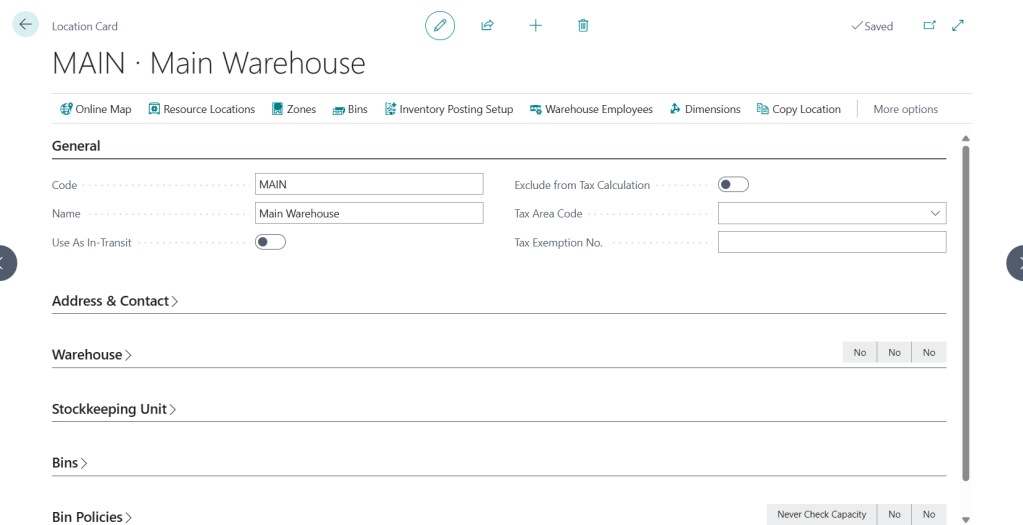
Navigate to the Locations page and select New. Here are the critical fields every architect and consultant must configure:
General FastTab
- Code & Name: Use a concise, standardized alphanumeric naming convention (e.g.,
WH-EAST,STORE-01). - Use As In-Transit: Leave this OFF for standard warehouses. Only enable this checkbox if this specific location card is designated strictly as an In-Transit Location (e.g.,
LOG-TRANSIT).
Warehouse FastTab (Operational Complexity Level)
Business Central allows you to tailor warehouse complexity per location independently:
- Require Receive / Require Shipment: Separates operational warehouse activities from financial purchase receipts/sales shipments.
- Require Put-away / Require Pick: Introduces warehouse instructions for warehouse staff.
- Bin Mandatory: Requires every transaction at this location to specify a precise bin code without necessitating advanced directed pick/put-away rules.
Architect Tip: Keep regional retail stores or field service vans simple (no warehouse documents checked), while setting your main Distribution Center to Require Shipment and Require Receive. You do not need the same operational complexity across all locations.
3. Financial Mapping: Inventory Posting Setup
Every location must be linked to your General Ledger.
- Go to Inventory Posting Setup.
- Create lines mapping every Location Code against each Inventory Posting Group (e.g.,
RAW MAT,FINISHED). - Define the Inventory Account (Balance Sheet) for that specific location.
Why this matters: If you store goods at a 3PL or consignment site and require separate balance sheet reporting by facility, mapping distinct G/L accounts per location makes month-end audit reconciliations straightforward.
4. Configuring In-Transit Locations and Transfer Routes
One of the biggest mistakes in multi-location implementations is using Item Journals or Reclassification Journals to jump stock instantly from Location A to Location B. When inventory travels across distances, it must sit in an In-Transit Location so ownership is maintained on the balance sheet without showing as available stock at either physical warehouse.
Step 1: Create an In-Transit Location
- Code:
TRANSIT - Name:
In-Transit Logistics - Use As In-Transit: Checked (Yes)
Step 2: Set Up Transfer Routes
Navigate to Transfer Routes. This matrix defines valid paths between physical nodes:
- Locate the intersection between your Transfer-from Code (e.g.,
MAIN) and Transfer-to Code (e.g.,WEST). - Drill into the matrix cell and define:
- In-Transit Code: Select your designated
TRANSITlocation. - Shipping Agent Code & Shipping Agent Service: (e.g.,
FEDEX,OVERNIGHT) to establish automated transit lead time. - In-Transit Lead Time: (e.g.,
2Dfor 2 days). This drives replenishment calculations in MRP.
- In-Transit Code: Select your designated
5. Executing the Two-Step Transfer Order Workflow
When transferring stock across meaningful distances, always use a Transfer Order rather than a Reclassification Journal.
Step A: Create and Ship the Transfer Order
- Open Transfer Orders and click New.
- Select Transfer-from Code (
MAIN) and Transfer-to Code (WEST). The system automatically populates the In-Transit Code based on your Transfer Route matrix. - On the lines, enter the Item No. and Quantity (e.g., 50 units).
- Click Post -> Select Ship.
System Impact:
- 50 units leave
MAIN(Item Ledger Entry: Transfer Shipment). - Physical stock at
MAINdecreases by 50. - Stock at
WESTremains unchanged. - 50 units are now recorded at the
TRANSITlocation. Valuation remains on your company balance sheet, but the inventory is unavailable for sales reservation at either warehouse.
Step B: Receive at Destination
When the truck arrives at the destination warehouse:
- Open the existing Transfer Order (or find it via Transfer Order Lines).
- Verify the Qty. to Receive.
- Click Post -> Select Receive.
System Impact:
- 50 units are consumed from
TRANSITand posted intoWEST(Item Ledger Entry: Transfer Receipt). - Inventory is now visible, available, and pickable at
WEST.
Advanced Tip: Stockkeeping Units (SKUs)
What if an item costs $10 to manufacture at your main plant, but costs $12 at a remote facility due to freight handling? Or what if you want to use Reorder Point planning at your retail store, but Lot-for-Lot at your central plant?
Enter Stockkeeping Units (SKUs):
- SKUs allow you to override Item Card rules (Replenishment, Costing, Planning) for a specific Item at a specific Location.
- Set the SKU Replenishment System at the branch location to Transfer, pointing back to your central hub as the supply source. When the branch runs low on stock, the MRP Planning Worksheet will automatically suggest a Transfer Order instead of a Purchase Order!
Common Pitfalls & How to Avoid Them
| Issue / Trap | Root Cause | Solution |
| “In-Transit code must have a value” | No Transfer Route exists between the two selected locations. | Set up the route in the Transfer Routes matrix before creating the Transfer Order. |
| Inventory stuck in Transit indefinitely | Warehouse staff shipped the Transfer Order, but the receiving team never posted the receipt. | Run the Inventory in Transit report monthly to spot overdue or ghost shipments. |
| Direct Transfers skipping transit | Using Direct Transfer toggle when transit actually takes multiple days. | Only use Direct Transfer for intra-facility movements (e.g., Building A to Building B on the same campus). |
Looking Ahead: The Agentic ERP Horizon 🤖
Managing logistics and multi-site rebalancing often involves manual paperwork and constant tracking across disparate portals.
In an Agentic ERP architecture:
- Autonomous Inventory Balancing Agent: An AI agent monitors regional sales velocity across all locations. When it detects an unexpected surge in demand at Store B paired with excess holding stock at Warehouse A, it automatically creates a suggested Transfer Order, schedules carrier pickup via API, and alerts the warehouse manager.
- In-Transit Exception Agent: If an in-transit order exceeds its expected delivery window (tracked via carrier API webhooks), an agent flags the delayed shipment, calculates the risk of stockout at the destination, and automatically reroutes local sales demand or notifies impacted customers before they notice a delay.
Summary
Setting up multiple locations and transfer routes in Business Central provides total operational and financial clarity across your supply chain. By defining distinct location complexity, automating routes with lead times, enforcing two-step transfer workflows, and leveraging SKUs, you eliminate inventory blind spots and establish an infrastructure ready to scale.

