
In a perfect business environment, every sale is final and every delivery is flawless. In the real world, handling customer returns and issuing financial corrections is an operational certainty. If your organization processes returns using ad-hoc entry adjustments, you risk misstating your inventory valuation, messing up sales tax reporting, and losing historical traceability.
Microsoft Dynamics 365 Business Central offers two distinct, highly audit-compliant workflows for managing this process: Sales Return Orders and Sales Credit Memos.
Let’s walk through the exact functional configurations, operational steps, and ledger impacts from the field.
Step 1: Choosing Your Workflow (Credit Memo vs. Return Order)
Before entering a document, a functional consultant must help the business decide on the correct architectural path:
- Sales Credit Memo (Page 44): Ideal for pure financial corrections (e.g., a customer was overcharged) or simple, low-volume returns where the physical goods are processed and received simultaneously.
- Sales Return Order (Page 6605): Required for complex scenarios involving multi-step logistics, warehouse inspections, or tracking replacement shipments.
To start, search for Sales Return Orders in the global menu and click New.
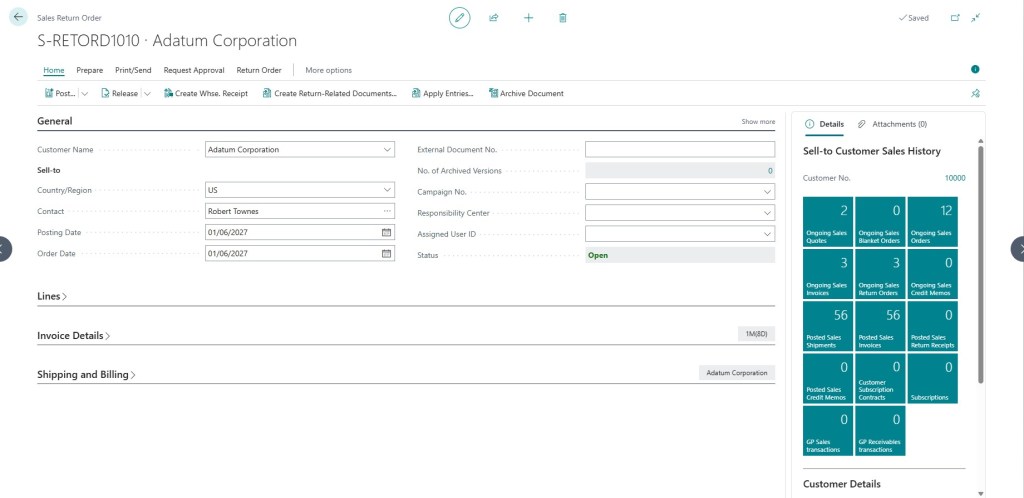
Step 2: Eliminating Errors with “Get Posted Document Lines”
The biggest mistake end-users make is manually re-typing items, quantities, and prices on a return document. This breaks your original cost correlation.
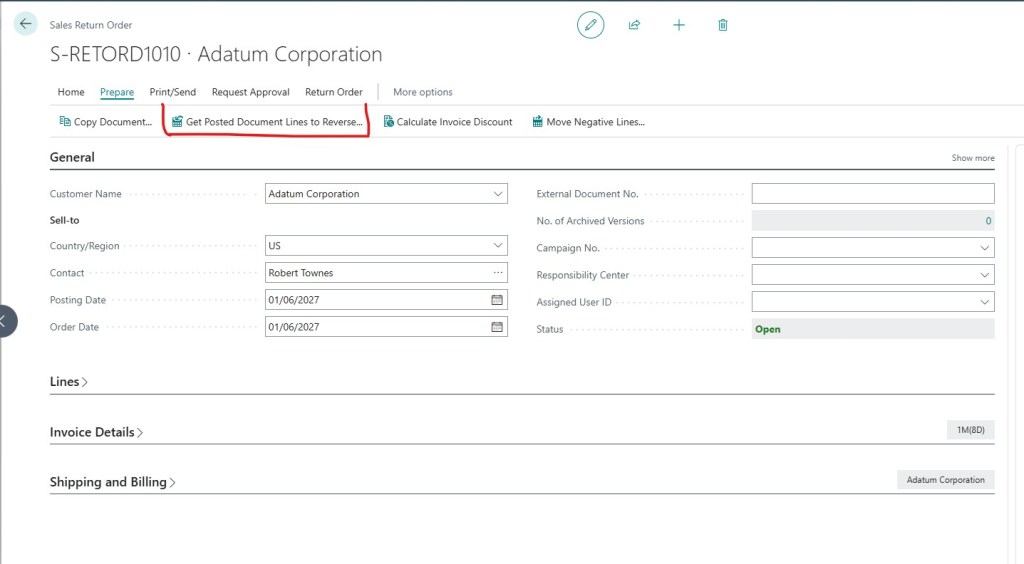
Instead, go to the action ribbon, click Prepare, and select Get Posted Document Lines to Reverse. This allows you to search for the original Posted Sales Invoice and pull the exact lines natively into your return order.
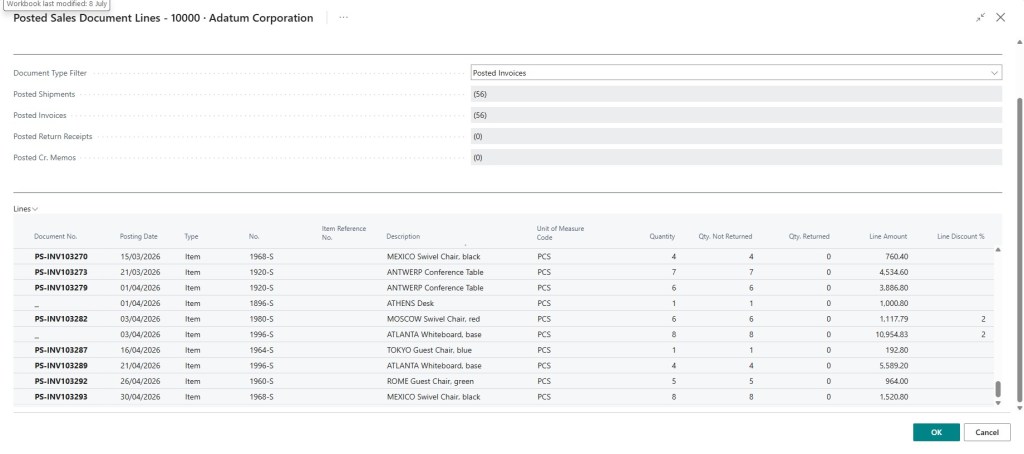
Architect’s Note: Utilizing this standard function forces Business Central to populate the Appl.-from Item Entry field behind the scenes. This ensures that when the item is physically received back into stock, it is re-valued at its exact original acquisition cost, keeping your FIFO or Standard Costing ledger pristine.
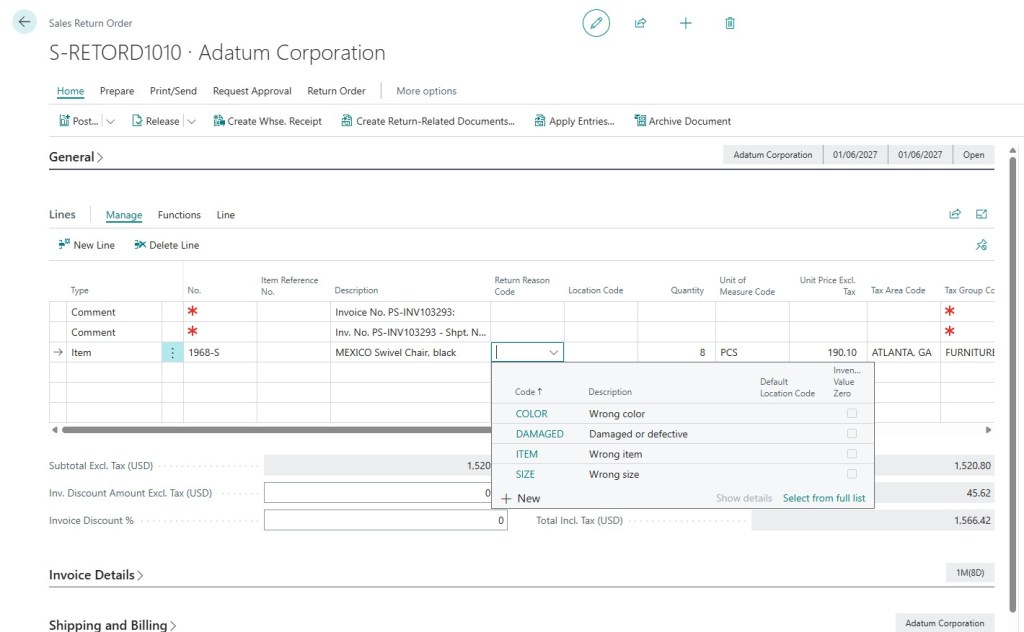
Step 3: Setting the Return Reason Code
Why is the item coming back? Is it damaged, incorrect, or did the customer simply change their mind?
On the document lines, you must assign a Return Reason Code. This code is not just a text label; you can configure it to route items to a specific “Damaged” or “Quarantine” warehouse location automatically, preventing bad stock from being reallocated to new sales orders.
Step 4: Posting the Return & Credit Memo
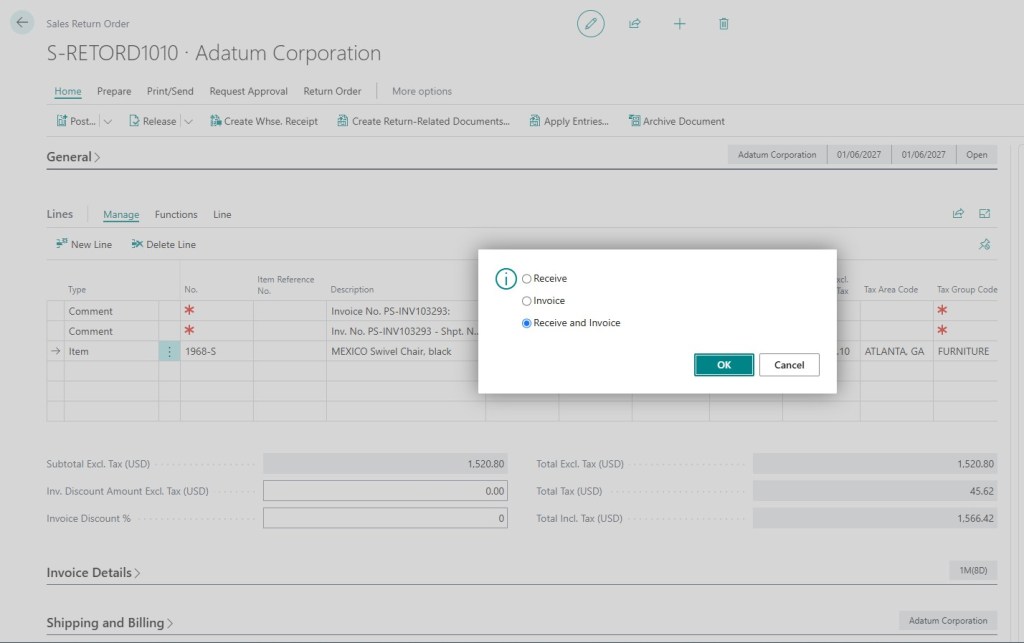
To finalize the process, navigate to Post > Post. You can choose to Receive the goods first (warehouse step) and Invoice later (finance step), or process both simultaneously.
The Ledger Impact:
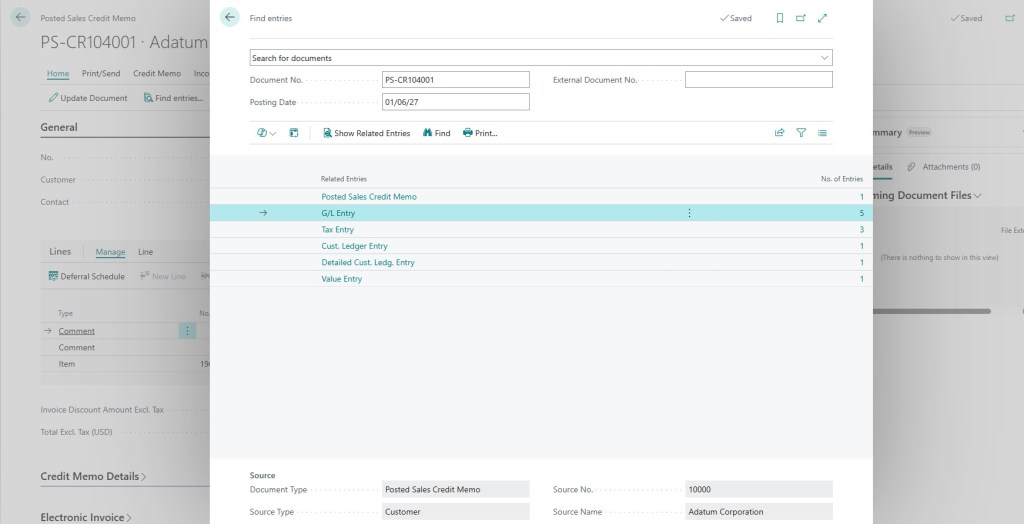
Posting generates a permanent Posted Return Receipt and a Posted Sales Credit Memo. This updates your data architecture instantly:
- Customer Ledger Entries: Creates a negative open balance, reducing what the customer owes or generating an active credit balance.
- Item Ledger Entries: Adds the physical inventory quantity back to the designated Location Code.
- General Ledger Entries: Reverses the original Revenue, adjusts Accounts Receivable, and reverses the original Cost of Goods Sold (COGS) value.
The Foundation for Agentic Automation
Building a clean, error-free reverse logistics flow is a hallmark of operational control. In the context of Agentic ERP, it serves as an excellent framework for automation.


Leave a Reply