
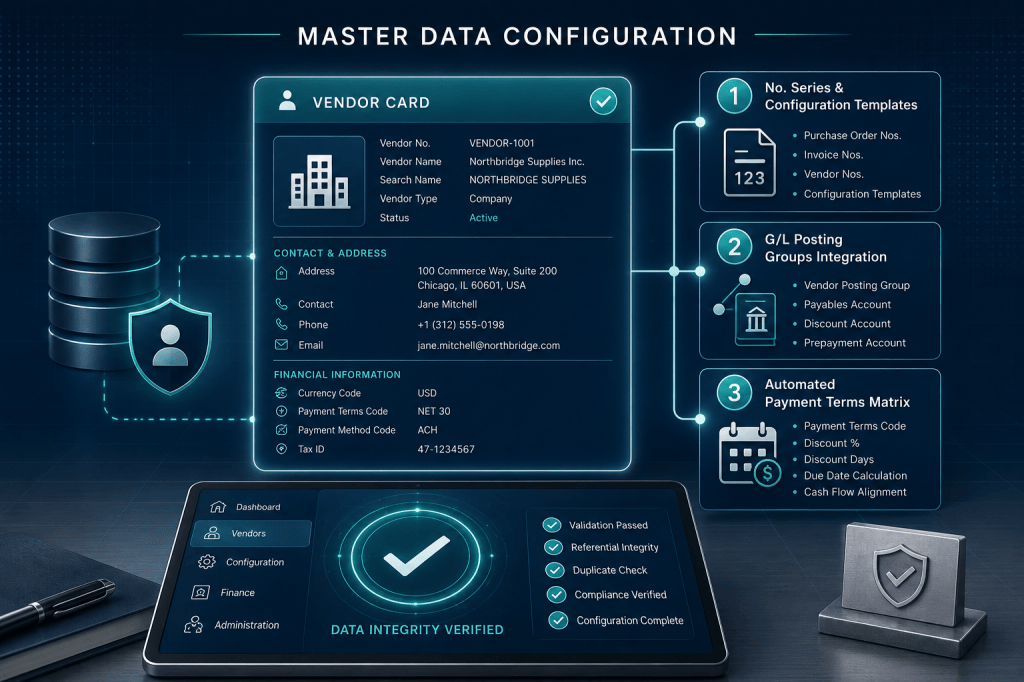
When onboarding a new supplier in Microsoft Dynamics 365 Business Central, it is incredibly tempting to fill in the vendor’s name, drop in an address, and call it a day. However, treating the Vendor Card (Page 27) as a passive address book is one of the most common mistakes an organization can make.
The Vendor Card is a powerful financial control panel. Configuring it correctly ensures that purchase orders flow smoothly, payment dates calculate automatically, and tax audits don’t become a nightmare.
Let’s look at the essential data fields and configuration parameters every Solution Architect and Functional Consultant should enforce during a master data rollout.
Step 1: Enforcing Strict Numbering Series & Templates
Consistency starts at the structural level. Instead of allowing manual, alphanumeric typing for vendor IDs which quickly results in duplicate profiles always enforce a standard No. Series.
To maximize efficiency during high-volume onboarding, utilize Vendor Templates. Templates allow you to pre-define default parameters based on vendor archetypes (e.g., DOMESTIC, INTERNATIONAL, or SERVICE suppliers).
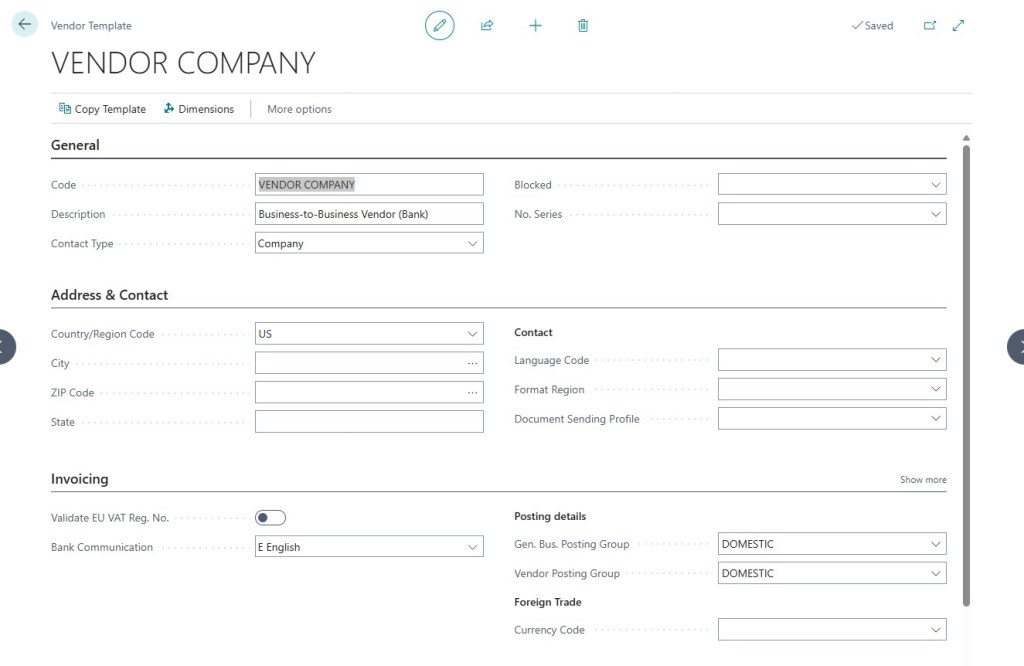
When you apply a template to a fresh card, it automatically populates the critical backend fields, reducing data entry time by up to 80%.

Step 2: Locking Down the Financial Routing (Posting Groups)
The Invoicing FastTab is where your data architecture bridges directly over to your Chart of Accounts. There are two non-negotiable configuration metrics here:
- Gen. Bus. Posting Group: Dictates how the system handles purchase revenue, product costs, and trade discounts based on who you are buying from (e.g., Local vs. Foreign trade zones).
- Vendor Posting Group: Maps the trade payables directly to your master Accounts Payable control account on the Balance Sheet.
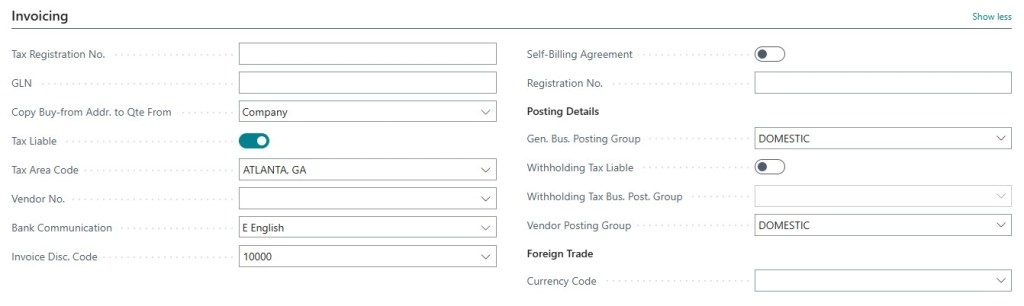
Note: If you change these parameters mid-year on an active vendor, historical open entries will still post to the old control accounts, creating reconciliation discrepancies. Lock these parameters down early and control editing access using strict user permissions.
Step 3: Automating Cash Outflows (Payments FastTab)
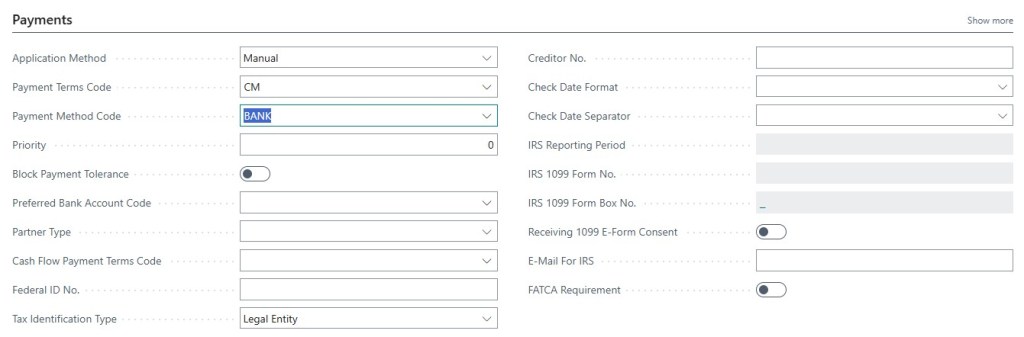
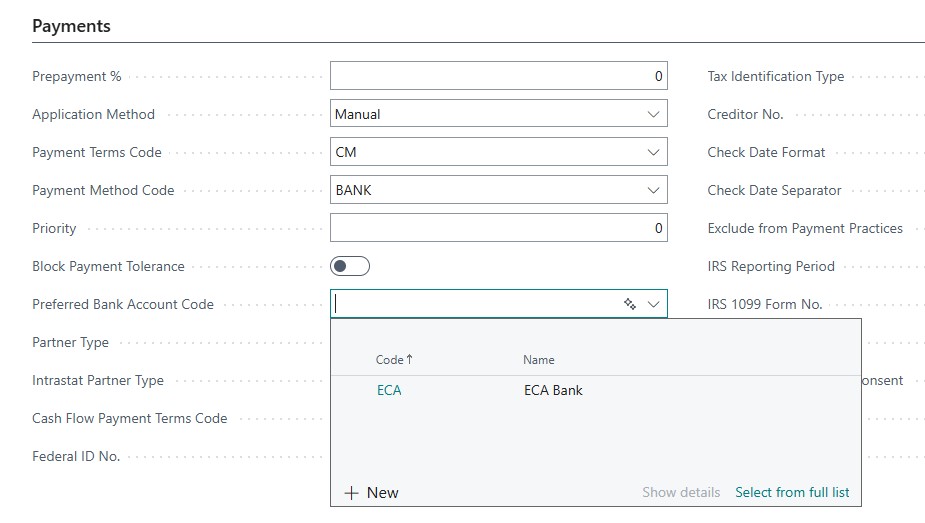
To keep your cash flow predictable and your purchasing agents unified, you must configure the Payments Fast-Tab.
- Payment Terms Code: Enforces your payment schedule (e.g., NET30 or CM for Current Month). This ensures that when an invoice is processed, Business Central calculates the due date automatically, preventing late-payment penalties.
- Payment Method Code: Defines how the money leaves your bank (e.g., ACH, WIRE, or CHECK). This is critical for filtering your automated Payment Journals later.
Step 4: Tax Integrity & Payment Verification
Before processing an operational document, your finance team must input the supplier’s tax identifiers. For US configurations, this includes the IRS 1099 codes; for regions like India, this involves pristine GST Registration details.
Furthermore, ensure that the Preferred Bank Account Code is filled in under the vendor’s navigation options. This ensures that electronic payment files point to validated, authorized banking coordinates, mitigating payment fraud risk.


Leave a Reply